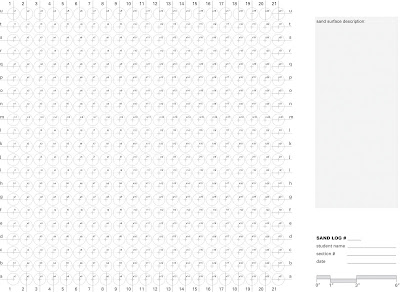
The new surface is due on Thursday along with a drawing including all of the 441 points of the grid. This is a big assignment so you should start right away. Take a picture of the final surface and print it as a 6x6 for Thursday, the sand should be smooth, make it pretty. The drawing instructions are below:
Goal:
To log & construct a plan oblique graphical representation of the surface of your dry sand plus pantyhose sandbox using only lines. The drawing is of the sand and not the pantyhose.
Procedure:
1) Download & print the pdf file "1412_Sp08_XXX_SandBox_441ptLog.pdf" on 11 by 17 paper in landscape format & "fit to print". The outcome should look close to this:

2) First write a description of the surface(s) in your sandbox in superficial & formal terms in the given space on the printed out log sheet. Use the terms we've started talking about in everyday geometries. Describe hierarchies, alignments, & other relationships / differences in surface quality. Describe the construction of the nylon and what forces are being performed to manipulate the surface of the sand.
3) Wrap the string around every nail to create the complete measuring grid with string. Now in your sandbox measure the height of the 441 pts indicated on the given graph & log each of them in pencil in the corresponding circle on your printed out log sheet. Keep this paper log. Pin it up over your box. It will be a part of your grade.
3) Wrap the string around every nail to create the complete measuring grid with string. Now in your sandbox measure the height of the 441 pts indicated on the given graph & log each of them in pencil in the corresponding circle on your printed out log sheet. Keep this paper log. Pin it up over your box. It will be a part of your grade.
4) We recommend you use Illustrator for this assignment if you have it but you can do the work in a CAD application too. These instructions will try to remain "neutral" but the CAD files may have some distortions and layer changes in them. All work was done in Illustrator.
For CAD: Download & open the DWG file "1412_Sp08_XXX_Sandbox_441ptWork.dwg".
Also for CAD: Download & open the DXF file "1412_Sp08_XXX_Sandbox_441ptWork.dxf".
For Illustrator: Download & open the AI file "1412_Sp08_XXX_Sandbox_441ptWork.ai".
You should have fewer problems than before with this drawing:

5) With the file open get familiar with all the layers, lineweights, & linetypes. You will draw in the work layers. The layers have been arranged so that the top three are your work, the next few are the most needed references, & the last few layers are more obscure and non-print references. You should use the layers you did for the 100 pt drawing.
6) Turn on the work layer "Depth Lines". On that layer we've started an example for you to review. You should be familiar with the method so you should just erase the sample. From each grid intersection draw a fine, grayed short dashed line down from the point as long as the sand is deep in the box. You may want to create more layers within the depth lines so you will have Depth A through Depth U. And if you want to be safe create layers for the numbered portions as well, Depth 1 through Depth 21. Since there are 441 points the endpoints will be hard to see. You can turn layers on and off it need be.
7) Turn on the work layer "WorkLayer-ProfileLines_East to West". Along each "east-west" row of depth lines connect the bottom end points of each line with a medium, solid , & black line segment. Turn one layer on at a time and just draw that row, rinse rather and repeat while moving from a to u.
8) Turn on the work layer "WorkLayer-ProfileLines_North to South". On that layer we've started an example for you to review. Once familiar with the method you should erase this sample. Along each "north-south" row of depth lines connect the bottom end points of each line with a medium, solid , & black line segment. Turn one layer on at a time and just draw that row, rinse rather and repeat while moving from 1 to 21.
9) Now turn off the depth lines & the notation so that you have the box, the sand surface, the top level intersections, & the title block. Be consistent with your prior prints.
10) Print it 1/2 scale on the OCE, or one of the large format printers in the print bureau. Pin this drawing up over your sandbox. Again it is important to be consistent with your prior prints.
11) Save the file as a pdf file named "1412_Sp08_XXX_Sandbox_441ptWork.pdf".
This is due on Thursday. You will be marked for completion.


